Build a Working K’NEX Trebuchet in these Easy Steps
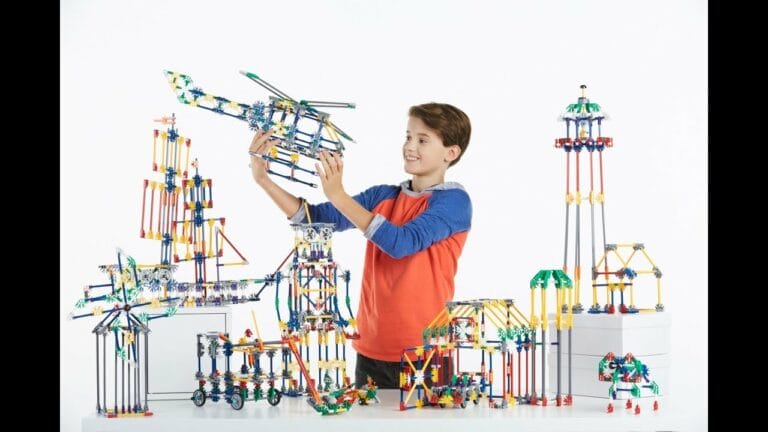
With K’NEX, you can build a wide variety of structures and models. You can build just about anything from simple machines to large models like marble runs, possibilities are endless!
K’NEX challenges budding builders and curious young engineers-to-be to build a variety of projects, whether with retail box sets and DIY (do-it-yourself) gadgets, including candy dispensers, ball machines, coin-sorting machines, trebuchets, and everything in between! Both sets and homemade projects offer learning opportunities and hours of entertainment. But, DIY models provide a more creative play experience and can be more budget-friendly. Today we will walk you through how to build a working trebuchet at home with the pieces you already own or can purchase online.
So, let’s get started with the fun and experiments with building K’NEX trebuchet models at home!
Why should I build K’NEX Trebuchet
Whether you are a beginner, looking to relive your own nostalgia, or just want the perfect gift for little builders, you can benefit from any case. Building K’NEX Trebuchets (and projects in general) offers numerous benefits, that are not limited but include:
Development of skills: K’NEX helps develop fine motor skills, problem-solving skills, and spatial awareness as users manipulate the small rods and connectors to create various structures.
Problem-solving skills: As users work on K’NEX projects, they learn to identify challenges and find solutions to complete the builds, fostering problem-solving abilities.
Imagination and creativity: K’NEX allows users to express their creativity and imagination as they design and build unique structures, vehicles, and characters.
Teamwork: When working with multiple K’Nex sets, users can collaborate and work as a team to complete more complex projects.
Instruction-reading: As users progress with K’Nex, they learn to read and follow instructions accurately to ensure successful builds.
Design skills: K’Nex encourages users to experiment with different angles, structures, and designs, helping them develop their design skills
Play value: K’Nex projects offer a high level of play value, as users can create and re-create various structures and scenarios.
Suitable for all ages: K’Nex is a fun building toy for all ages, providing a variety of projects and building options to suit different skill levels and interests.
It is important to know that when it’s about K’NEX, especially with DIY projects, promotes cognitive development and offers a learning experience fostering creativity and problem-solving skills as well as a fun and engaging activity for K’NEX fans of all ages.
How to build a working K’NEX trebuchet by step?
A wide range of captivating DIY projects are out there, ready to engage you with hours of fun and entertainment at home. From them, in this section, we will guide you through trying to build easier trebuchet models.
When building a K’NEX trebuchet, consider the following general tips to ensure a successful and efficient build:
Choose the right materials: Use K’NEXnex pieces that are sturdy and quality and can withstand the tension and weight of the projectile. You can either choose online new or second-hand pieces, parts you already have, or buy at physical retail stores.
They may include using larger connectors and rods for better support and durability.
Follow clear instructions: Plan your build by following a step-by-step guide, such as the one provided by Instructables we provide below from Instructable. This will help ensure a structured and organized build process.
Ensure proper tension: When constructing the trebuchet, make sure to maintain the correct tension in the arm and counterweight. This will help the trebuchet function smoothly and provide the necessary power to launch the projectile.
Test and adjust: As you build, test the trebuchet’s functionality and make adjustments as needed. This may involve tweaking the tension, repositioning the arm, or adjusting the counterweight for optimal performance.
Safety precautions: Be cautious when building and using the trebuchet. Wear protective gear, such as gloves, to avoid injuries. Also, ensure that the trebuchet is built on a stable surface and is securely anchored to prevent accidents.
Measure and record: Keep track of the trebuchet’s performance by measuring the distance and height of the projectile’s launch. This can help you fine-tune the trebuchet’s design and improve its performance over time.
If you are not sure where to start, here we bring two simple trebuchets with easy-to-follow instruction manuals. There are complete parts lists and assembly instructions so that you can have hours of creative and fun building. However, feel free to combine different ideas, get inspired by them, and come up with your unique creations:
Making this first trebuchet does not take a lot of time, and it is pretty easy to operate. It weighs about one pound and can fire three feet before it hits the ground. Unlike most catapults or trebuchets, it doesn’t require wheels. You can use whatever is lightweight and fits in the container for ammunition, as the author did.
Step 1: Materials

First, here are all the materials you will need to make a K’Nex Trebuchet, including 6 red, 5-inch pieces, 5 orange, 5-inch pieces, 12 yellow, half circle connectors, 10 yellow, 3-and-a-quarter inch pieces, 8 purple, 2 and a half inch pieces, 2 white, 1 and a quarter inch pieces, 6 orange, straight connectors, 9 white, full circle connectors, 4 gray, 7-and-a-half-inch pieces, 2 blue/purple, full circle/vertical connectors, 2 gray stoppers, with a hole one end and a connector on the other, 3 C cell batteries, Duct Tape.
Step 2: Base


Once you have all the pieces together, start building the base.
This step handles one of the most important parts of any trebuchet, the base. Start by taking 4 white connectors, use 4 orange pieces to connect them, and make a square. Then, take 4 yellow pieces and one white connector and make a plus, then insert this into the middle, making a square with an X in the middle.
Take 4 yellow connectors and slide them onto opposite orange pieces. Now, connect 2 purple pieces together using an orange connector. After that, take the connected purple pieces and attach them to a yellow connector, so that they are one below the vertical space and are horizontal. Do the same on the other side, but with an orange piece.
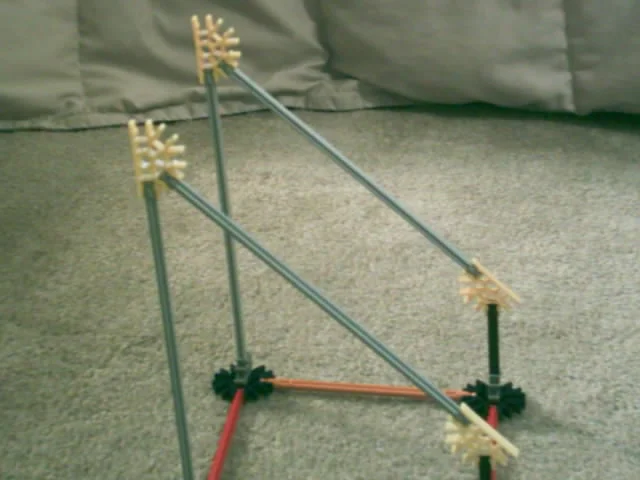
Step 3: Platform for the Trebuchet Arm

In this step, you build a platform for your trebuchet’s swinging arm:
- Use 4 gray pieces and attach them to your yellow pieces, so that they are vertical.
- Take 4 yellow connectors and attach them upside down, so that the flat part is facing upward and the curved part is facing downwards.
- Use 2 red pieces to connect opposite sides of the platform. You must connect them as shown so that the trebuchet’s arm can swing.
- Attach 2 white connectors to opposite red pieces.
- Attach the white connectors with a yellow connector.
Step 4: Stabilizers
Add some stabilizers to the front to keep it from tipping over.
- Take 2 red pieces and attach them to different white connectors on the base, so that they are pointed forwards.
- Attach your 2 blue/purple connectors to the ends of the red pieces.
- Attach a red piece and a yellow piece using an orange connector. Now, connect one end to the blue/purple connectors so it runs to a yellow connector on the top. Attach it there as well. Do this again so that both blue/purple connectors are connected to a yellow connector.
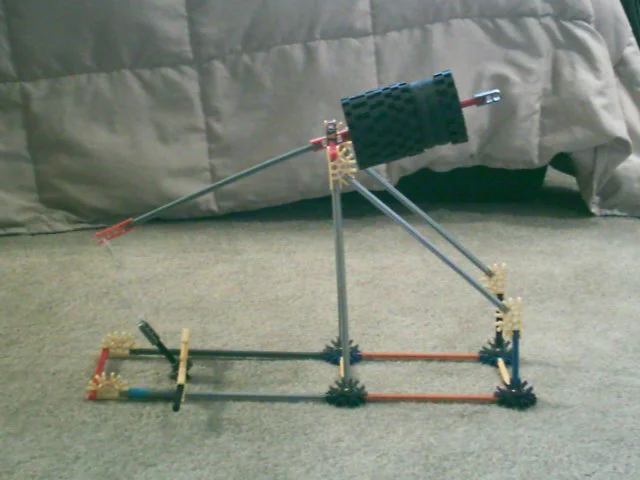
Step 5: Trebuchet’s Arm

This is the most important step in your K’NEX Trebuchet.
- Attach a yellow piece to one end of a white connector, and an orange piece to the other.
- Attach a second yellow piece to the first yellow piece using an orange connector. This is called the arm.
- Take a white connector and attach 4 purple pieces to it, in the same as the base. Attach them to four different corners. This part is called the container.
- Attach the container to the end of the arm that you made.
- Slide the arm onto the yellow piece that connects the two white connectors on the platform. Make sure that the container is pointed towards the stabilizers.
- Center it, then attach the 2 gray stoppers onto either end, so that it can’t move from side to side.
- Duct tape the three C-cell batteries onto the end of your arm that doesn’t have your container. This will provide the weight that will make your trebuchet fire.
Step 6: The Swing Controller

This controls how far your trebuchet’s arm can swing. Without this, the trebuchet fires much less effectively.
- Connect a yellow piece to a purple piece using an orange connector. Do this again, so that you have two.
- Attach these to the white connectors that are part of the platform, so that they are vertical.
- Connect 2 yellow connectors to the tops of these, so that the flat side is facing upwards and the curved side is facing downwards.
- Use a red piece to attach these two yellow connectors together, in the same way as the base.
- Attach 2 white pieces to the yellow connectors so that they are pointed away from your stabilizers.
- Attach 2 more yellow connectors to the ends of these.
Pull back the trebuchet’s arm, then connect the two yellow connectors together in the same way as the red piece.
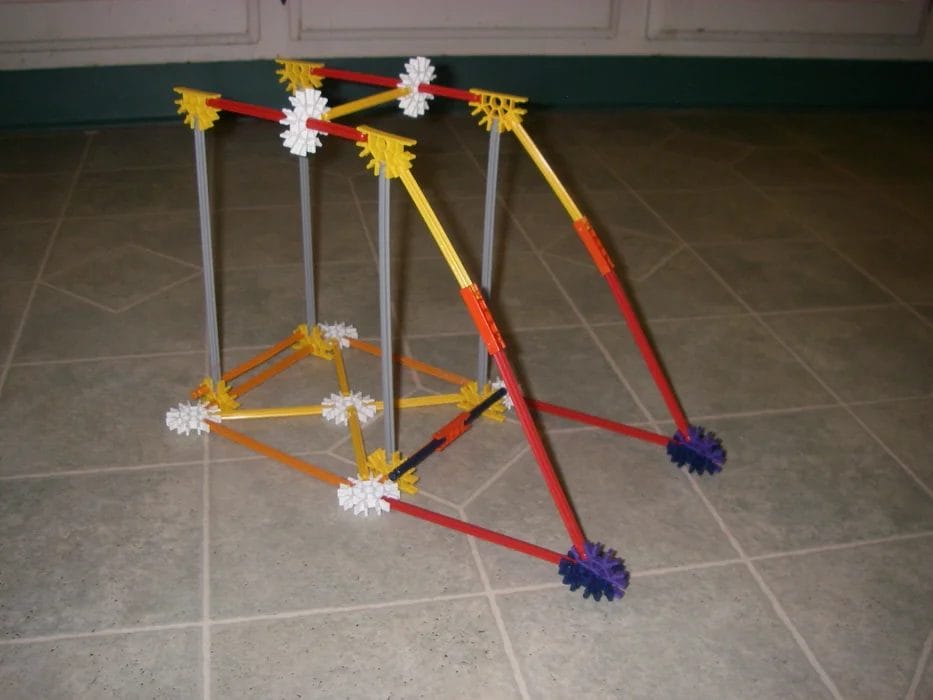
Step 7: The Result
This is all it takes for your very own K’NEX Trebuchet. Feel free to modify this design in any way you see fit and try with more weight on it.
Let’s build a second Simple K’NEX Trebuchet!
Feeling like building another K’NEX Trebuchet? Here is a very simple one with instructions:
As with the first one, you will need to gather all the necessary parts to assemble a functional trebuchet out of K’NEX. So let’s get started with steps.
Step 1: Parts List

Start with getting Rods: 7 grey, 4 red, 3 blue, 3 yellow; Spacers: 3 gray, 4 blue (3 blue = 1 grey); Connectors: 7 yellow, 2 orange, 3 grey end cap things, 4 purple, 4 blue, 1 small gear.
Step 2: Make the Arm

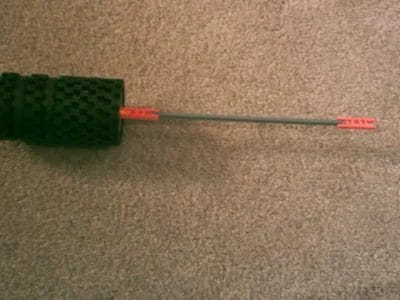
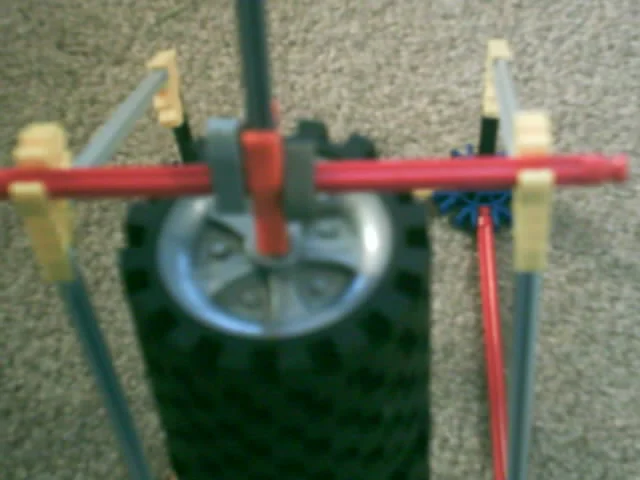
To build the trebuchet arm, you will need the 2 orange connectors,1 grey rod,1 red rod,8 tires,1 grey connector.
Put the grey connector on the end of the red rod. Slid the tires on. Put an orange connector on the other end. Put the grey rod on the other end of the orange connector. Put another orange connector on the end of the grey rod.
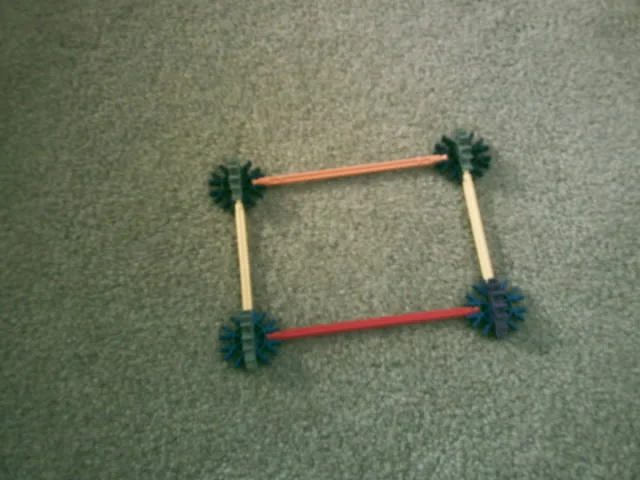
Step 3: Make the Base
Step 4: Put the Arm On
In this step, you must slide a red rod through the bottom orange connector. Put grey end caps next to it. Put it on the top yellow connectors of the base.
Step 5: Extend the Base Ad Add the Trigger

Put two grey rods on the back. Slid the spacers on the right grey rod. Cap those with yellow connectors. Put a yellow rod inbetween the yellow connectors. Now take a yellow connector on the right grey rod right after the spacers. Put a red rod toward the inside on the yellow connector and a blue one toward the outside.
Step 6: Making the Projectile

Put a grey cap on a blue or white rod. Now put a small gear on the rod. Tie some string on the connector and a loop at the other end.
Step 7: Ready to fire
As a final step, put the looped end of the projectile on the back side of the top orange connector of the arm. Pull down to the trigger and ready for battle.
Ready to embark on a really fun K’NEX journey?
If you are ready for a journey of creativity, engineering, and design – don’t forget, that the key to K’NEX DIY projects is to have fun and be creative. Building a K’NEX trebuchet can be a time-consuming process, so be prepared to invest time and patience in the project. If you want to challenge your building skills or prepare for more exciting journeys, try our recommendations for DIY K’NEX guns and thrill-seeking roller coasters!